
Perfectly straight, healthy and shiny hair is now an attainable goal. We have access to open information on the Internet, where we compare products, study instructions, techniques and try to apply straightening at home without resorting to salon specialists. Keratin products are usually used by master hairdressers in beauty salons. However, due to the considerable cost of such a service and the desire to save money, girls want to apply it to themselves. Our article will help you to understand whether it is possible to make keratin straightening at home and how safe it is.
Are keratin-containing products harmful?
Keratin is a protein, the building material for nails and hair, is harmless to humans. The industry is not sleeping, and cosmetic manufacturers have learned to make products containing this element, nutrients, oils, proteins and natural components. But with professional straightening formulations should be careful. They contain a high concentration of active ingredients, so they are mainly used by trained personnel. If you have decided to make keratinization at home, it is necessary to follow the protocol during the performance. Also, you will definitely need help in the form of a second person. Without an assistant, the likelihood of success is questionable.
Cosmetics, materials and tools for home straightening
- Shampoo deep cleaning;
- Keratin. Choose the strength of straightening based on the type of your strands;
- Colorist Brush. Trim it to get the necessary stiffness, for easy application;
- Hairdresser's bowl with measurements;
- A heat-resistant carbon comb with fine teeth;
- Crocodiles for hair (clips);
- Nitrile gloves
- Hairdresser's negligee. Try using an old sheet or any cape you don't mind getting dirty;
- Apron. Found in most households;
- A hair dryer. Be sure to have a cold blowing mode;
- Professional iron with ceramic or titanium plates.
The advantages of keratinization
- Perfect smoothness with a mirror-like shine
- Maintains effect for 4 to 6 months (with proper home care)
- Grows the length you want
- Can be styled in as little as 5 minutes (no curling iron required).
- Thickness and strength
- Eliminates dryness, breakage and split ends
- Elastic curls and soft curls that feel pleasant to the touch.
Methods and instructions for homemade keratin
Two ways to straighten at home:
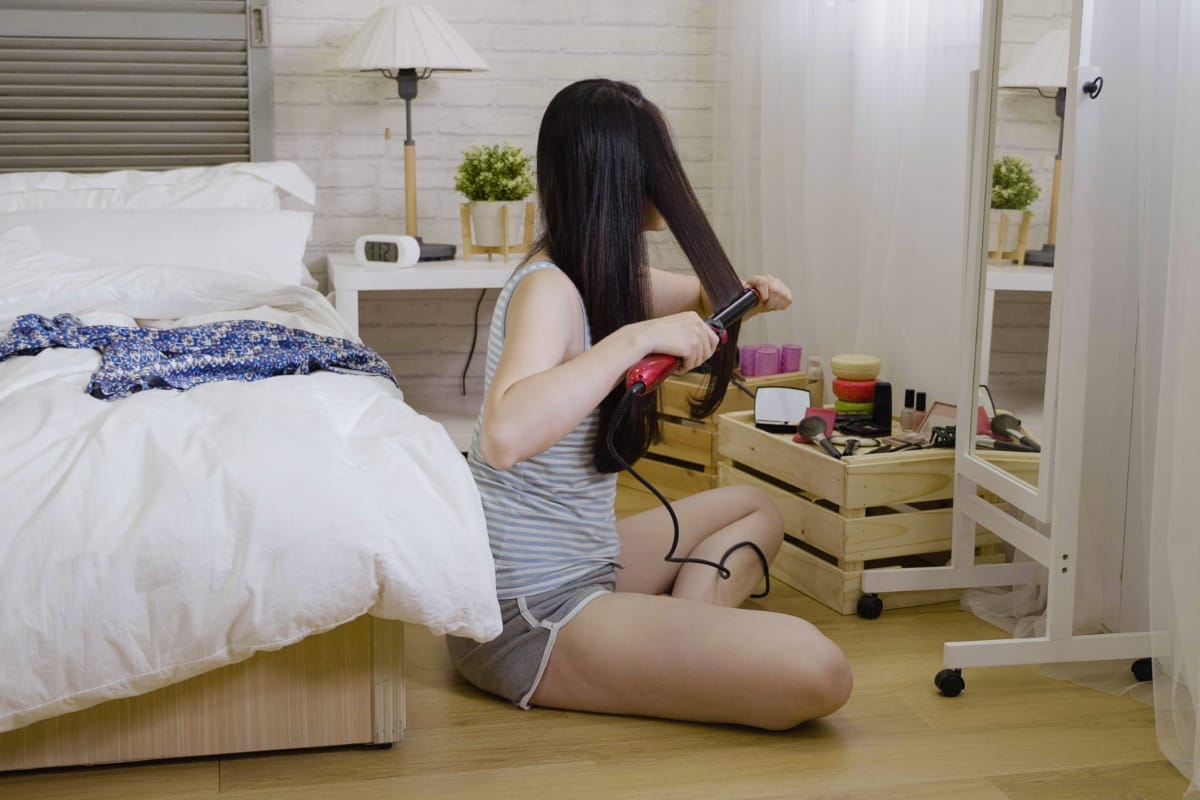
- Self. We will note right away that we do not recommend straightening your own hair. There is a great probability to burn yourself by the side edges of the iron, as well as you will not be able to accurately and efficiently work through the nape of the neck strands and the crown. As a result you are most likely to remain unsatisfied with the result, and in the worst case you will have to go to the doctor with burns from the iron.
- With an assistant. Such an assistant can act as any of your closest relatives: your mother, sister or friend. This variant is safer, not because "one head is good..." you know. But because you don't have eyes in the back of your head. The second participant will be able to see the back of your head and work it thoroughly. An additional person will have control and be able to hold a surface heated to 170-210 degrees at a distance of about 3 cm from the scalp.
The first method is suitable for those who want to straighten the front, bangs or at most, the sides. You will get acquainted with the composition, understand how the straightener works and how effective it is. Further it is better not to experiment.
The second method will give a full-fledged chance to home hair straightening, aimed at getting what you want. If you have a helper, confidence, observance of safety precautions and following the recommendations, you will get the long-awaited effect.
Step-by-step instructions with comments:
1. Preparing for keratin straightening
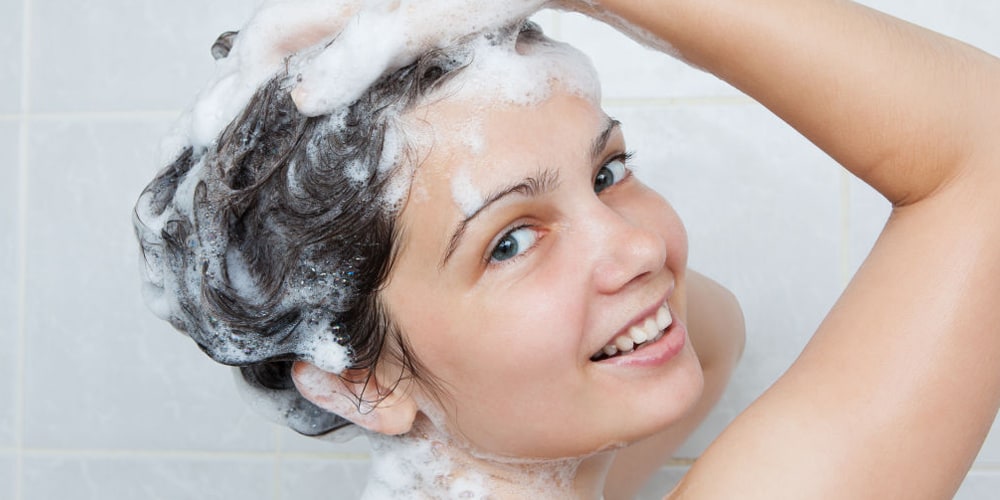
Put on gloves. Squeeze out a few grams of deep cleansing shampoo. Rub it with light massaging movements. Rinse. This action is performed twice. When reapplying the shampoo, it is necessary to keep the foam for 3 to 5 minutes. This will open the cuticle, clean the hair from dirt and various cosmetic impurities from the stylings, varnishes, sprays and oils you used before.
2. Drying .
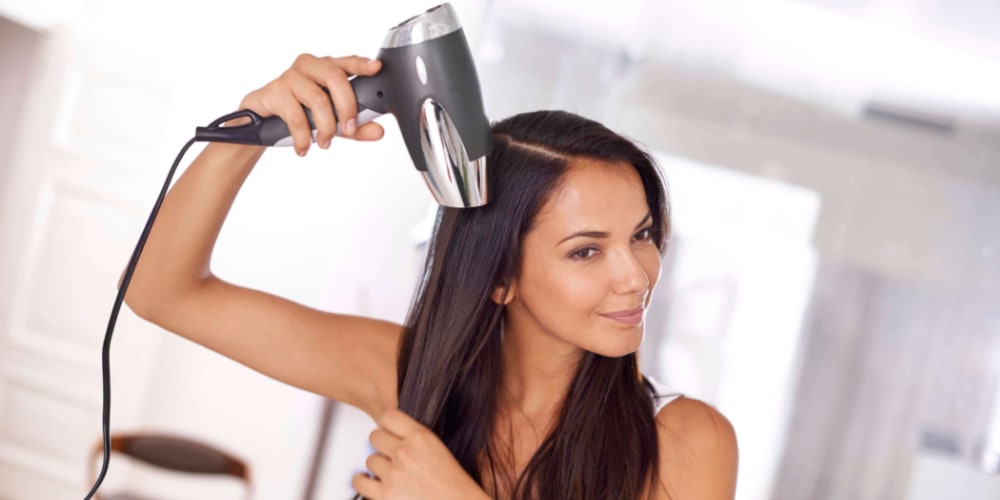
Blot the hair with a towel and dry it with a blow dryer at about 75% warm air. Simply put, leave it slightly damp. You do not want to dry it completely.
3. Measure the amount of straightener you need.
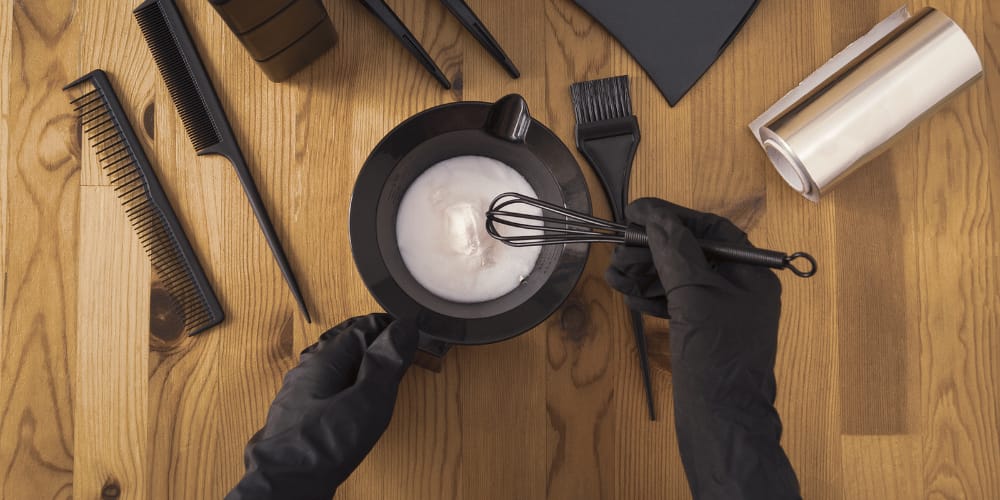
Using the chart below and a measuring bowl, measure the length of your locks and pour the mixture into them. If your hair is too long and very thick, you can add to the table values plus 5-10 grams. You can buy small volume keratin in our store. This is enough for 2-3 applications.
The table of dependence of long curls on the consumption of straightening agent
|
1st to the shoulders |
2nd up to the shoulder blades |
3rd up to waist |
|
20-25 ml |
30-35 ml |
35-45 ml |
4. Applying the keratin composition
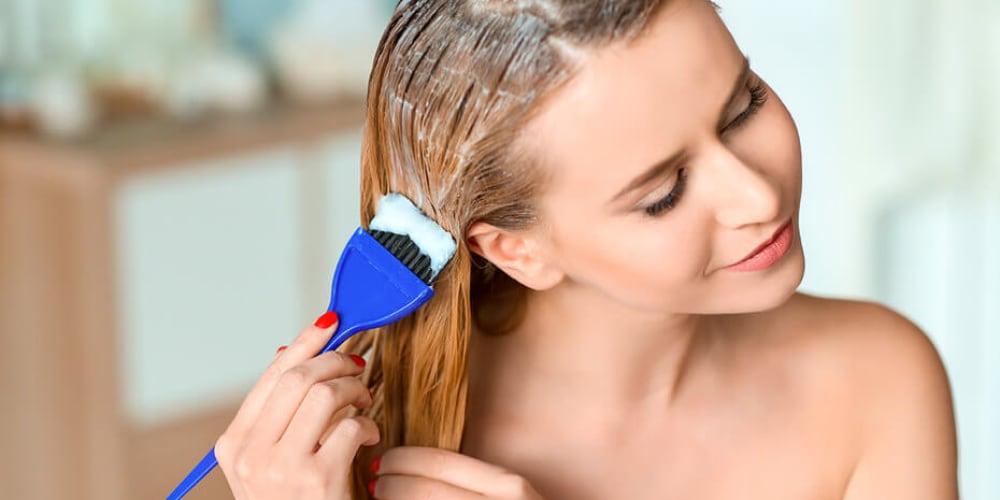
Divide the prepared hair into several sections. Fix them with clips. Then separate bundles about 1 cm thick. With a short, rigid, pre-cut brush we apply the composition in succession, starting from the nape of the neck, without overloading the hair and removing the excess of the product with a carbon comb. Remember! More is not better. It's important to maintain a balance.
5. Exposure .

Let the applied and diffused mixture stand on the hair for 25-30 minutes. During this time, the mixture will penetrate deep into the hair.
6. Drying again.
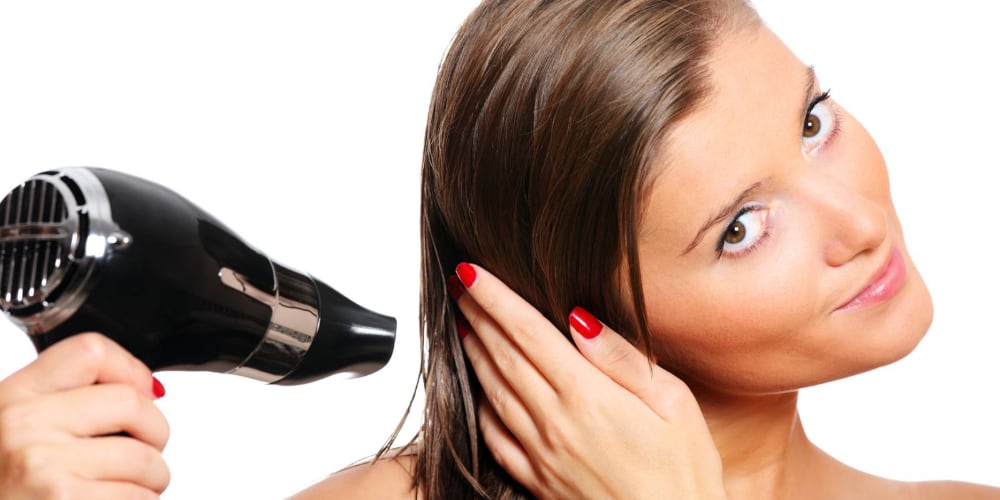
Now we blow-dry the hair 100% cold, i.e. completely.
7. Vaporizing the mixture.
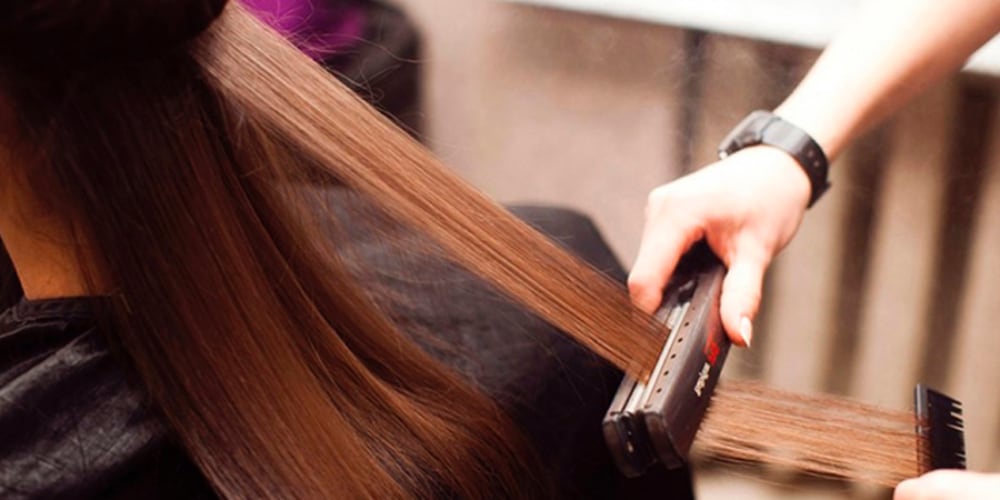
We take the prepared hair and go through the preheated iron. The temperature of the plates should be set according to the type of your hair. If you have a thin, bleached, damaged blond, the temperature should be low at around 170 degrees. And if you have thick, dense hair, you can put it at 210-230 degrees. Over the entire surface, we spend the iron 10-12 times, and the ends pull through 5-7 times (because the ends are thin and sensitive).
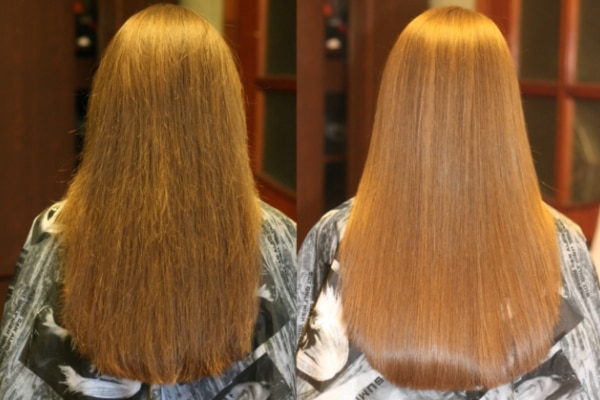
Done. Home keratin straightening completed!
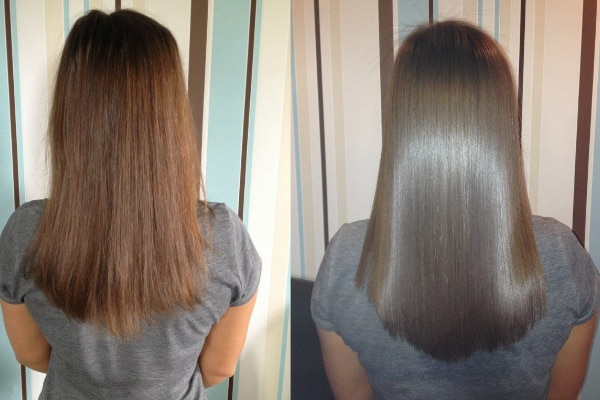
Photos before and after treatment

Pros and cons of home straightening
Pros:
➕ you can save on salon visits in the long run
➕ independent personal experience.
➕ opportunity to get beautiful and luxurious hair
Cons:
➖ high risk of ruining your hair when using it on your own at home
➖ possibility of getting burned when steaming
➖ need to buy additional hairdressing accessories.
Conclusions. Is home keratin straightening worth it?
If you are determined and confident that you are able to perform such a service on a regular basis, then approach the issue responsibly. Buy proven straightening products. Also, it is better to ask someone you know for assistance. When carrying out straightening at home, it certainly does not hurt.
And if after reading the article you have doubts, then feel free to go to the professionals of their business in the nearest beauty center. Yes, you will need to pay the full price for the session, which price reaches a few thousand hryvnia, depending on the skill of the master and the prestige of the salon. But the experience of a professional will be equal to the final result. It is worth it.
If you have any questions concerning straightening, do not hesitate to write in comments or in a chat. Brasil-Prof experts will give you all the information and help you decide on the appropriate product choice and method of flattening procedures. No matter if you do them at home or at the hair salon!


")
")


")


")
")
")
")
")
")

")
")


